How to Make a Music Video in Powerpoint 2010 TUTORIAL
How to Make a Music Video in Powerpoint 2010
Lesson 18: Inserting Sound
/en/powerpoint2010/inserting-videos/content/
Introduction
PowerPoint allows yous to add sound to your presentation, which opens up many possibilities. Perhaps you lot want to add background music to 1 slide, a audio upshot to another, and some narration or commentary to a few slides. You can either add together an sound file from your computer or scan PowerPoint's collection of prune art audio. You can and so edit the sounds within PowerPoint so they are tailored to your presentation.
In this lesson, you volition learn how to insert sounds into a presentation and edit them.
Inserting audio
Accept you lot ever watched a PowerPoint presentation that seemed to characterize itself? Or have you seen a slide show that featured applause when the final slide was reached? If so, you've heard examples of how audio can be applied to slide shows. PowerPoint allows you to insert sound files from your figurer, or you can search the Clip Art Studio to find the sound you demand. Once you've inserted audio, yous can then edit it.
Optional: You can download this example for extra practise.
To insert audio from a file on your reckoner:
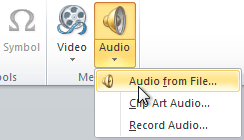
- From the Insert tab, click the Audio drop-down arrow and select Sound from File.
 Inserting an audio file
 - Locate and select the desired sound file, then click Insert.
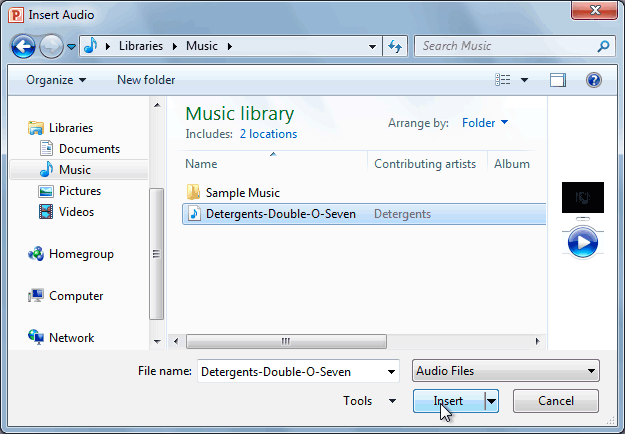 The Insert Audio dialog box
 - The audio file will be added to the slide.
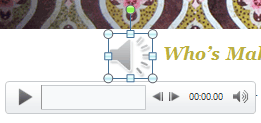 The inserted audio
To insert prune art sound:
- From the Insert tab, click the Sound drop-down arrow and select Prune Fine art Audio. The Prune Art pane will appear on the correct.
 Inserting Clip Fine art Sound
 - Enter keywords in the Search for: field, then click Go.
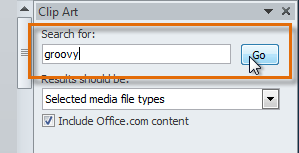 Searching for Clip Fine art Sound
 - The results will appear in the Prune Art pane. To preview an sound file, right-click the file and select Preview/Properties.
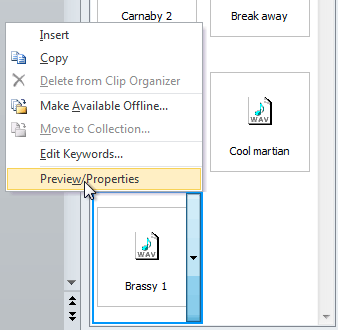 Selecting Preview/Properties
 - A dialog box will appear, and the sound file volition start playing automatically (it may take a few seconds to load). To play it over again, printing the Play button.
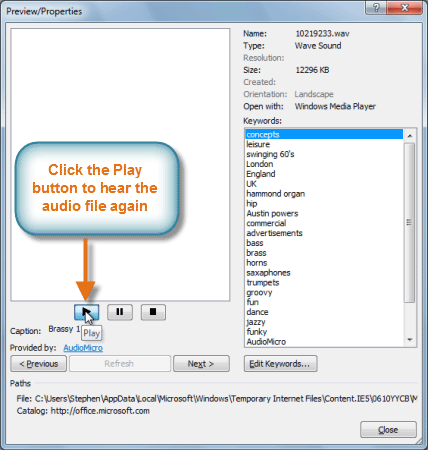 Previewing a Clip Art Audio file
 - When y'all're finished previewing the file, click Shut.
- Once you have found the audio file you desire to use, click information technology to insert it into the slide.
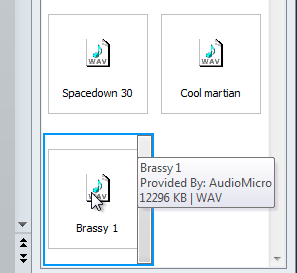 Clicking on Prune Art Audio to insert it
Recording your own audio
Sometimes you may want to tape audio directly into a presentation, like if you desire the presentation to include narration. Earlier you begin, make sure you accept a microphone that's uniform with your computer; many computers take built-in microphones or ones that can exist plugged in to the reckoner.
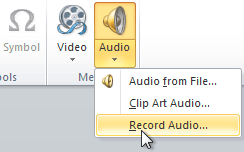
To tape audio:
- From the Insert tab, click the Sound drib-downward arrow and select Record Audio.
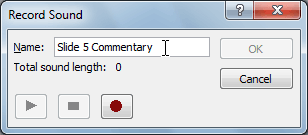
 Recording Audio
 - Blazon a proper noun for the audio recording if yous want.
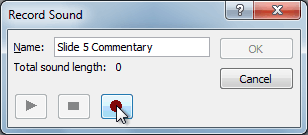
 Typing a proper name for the recording
 - Click the red Record button to showtime recording.
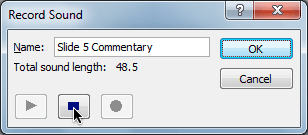
 Clicking the Record push button
 - When you're finished recording, click the End button.
 Stopping the recording
 - To preview your recording, click the Play push.
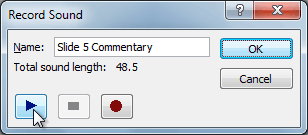 Previewing the recording
 - When you're done, click OK. The audio file will be inserted into the slide.
 The recording is added to the slide
Working with audio
Just like with videos, you tin can modify your audio files using the diverse features of the Playback tab. For example, if you add a song to a slide, you tin trim it so it will only play i department of the vocal, and yous tin can add a fade in and fade out to shine out the beginning and cease. You can likewise add bookmarks that allow yous to jump to specific points in the audio file.
To trim the sound:
- From the Playback tab, click the Trim Audio command. The Trim Audio dialog box will appear.
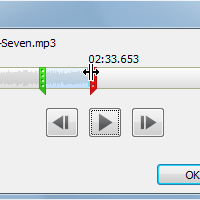
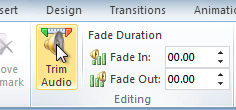 The Trim Audio command
 - Utilise the green and red handles to set the get-go time and end time.
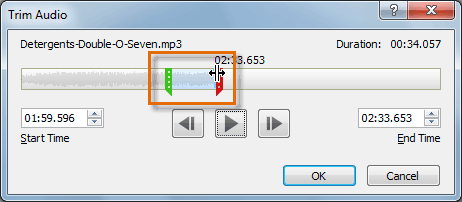 Moving the green and red handles
 - To preview the audio file, click the Play push button.
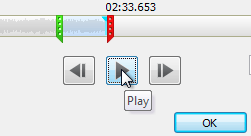 Previewing the audio file
 - Adjust the green and red handles again if necessary, then click OK.
To add a fade in and fade out:
- On the Playback tab, locate the Fade In and Fade Out fields.
- Blazon in the desired values, or apply the upwardly and down arrows to adjust the times.
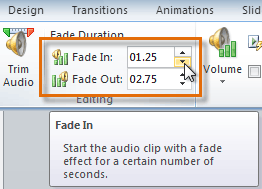 Adjusting the Fade In
To add a bookmark:
- Click the Play/Pause push button to play the audio file, and when you accept located the part y'all want to bookmark, pause it. You lot tin can also click the timeline to locate the desired part of the audio file.
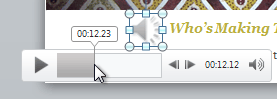 Locating the desired part of the audio file
 - From the Playback tab, click Add Bookmark.
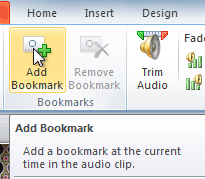 Adding a bookmark
 - A small circle will announced on the timeline to indicate the bookmark.
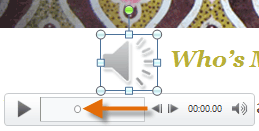 The new bookmark
 - You can at present click the bookmark to jump to that location.
To remove a bookmark:
- Select the bookmark.
- From the Playback tab, click Remove Bookmark. The bookmark volition disappear.
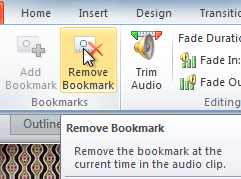 Removing a bookmark
Audio options
There are other options you can set to control how your sound file plays. These are found in the Sound Options grouping on the Playback tab.
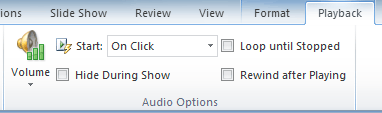 The Audio Options grouping
- Volume: This changes the audio book.
- Start: This controls whether the audio file starts automatically or when the mouse is clicked.
- Hide During Show: This hides the audio icon while the slide show is playing.
- Loop Until Stopped: This causes the audio file to echo until information technology is stopped.
- Rewind After Playing: This causes the audio file to return to the beginning when it'due south finished playing.
Formatting the audio icon
Past default, an audio file volition show upwardly as a speaker icon in the slide. If you want, y'all can change the icon to a different picture, and you lot can utilise all of the different types of image formatting that you would apply to a moving picture such every bit artistic effects and motion picture styles, which are accessed in the Format tab.
To change the icon to a different movie:
- Select the audio icon in the slide.
- From the Format tab, select the Modify Picture command. The Insert Moving picture dialog box will appear.
 The Change Picture command
 - Locate and select the desired film, and so click Insert.
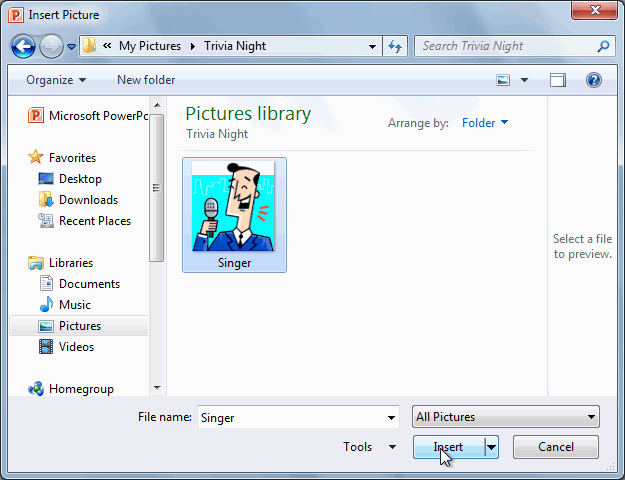 Selecting a new motion-picture show
 - The icon will change to the new motion-picture show.
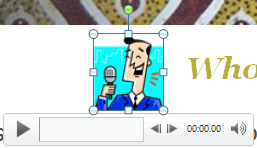 The updated sound icon
For information on corrections, color adjustments, borders, shapes, and furnishings, bank check out our lesson on Formatting Pictures.
Challenge!
- Open up an existing PowerPoint presentation. If y'all want, you can apply this example.
- Insert an audio file from your computer, if you accept ane. If you are using the example, add an audio file to slide 4.
- Preview the audio file.
- Trim the audio file.
- Add together a fade in and fade out.
- Add together a clip art audio file.
- Change the picture for one of the audio files.
- If your computer has a microphone, record some audio into a slide.
- Experiment with the different audio options on the Playback tab.
/en/powerpoint2010/smartart-illustrations/content/
DOWNLOAD HERE
How to Make a Music Video in Powerpoint 2010 TUTORIAL
Posted by: huberttifeally.blogspot.com


Komentar
Posting Komentar